
Salads
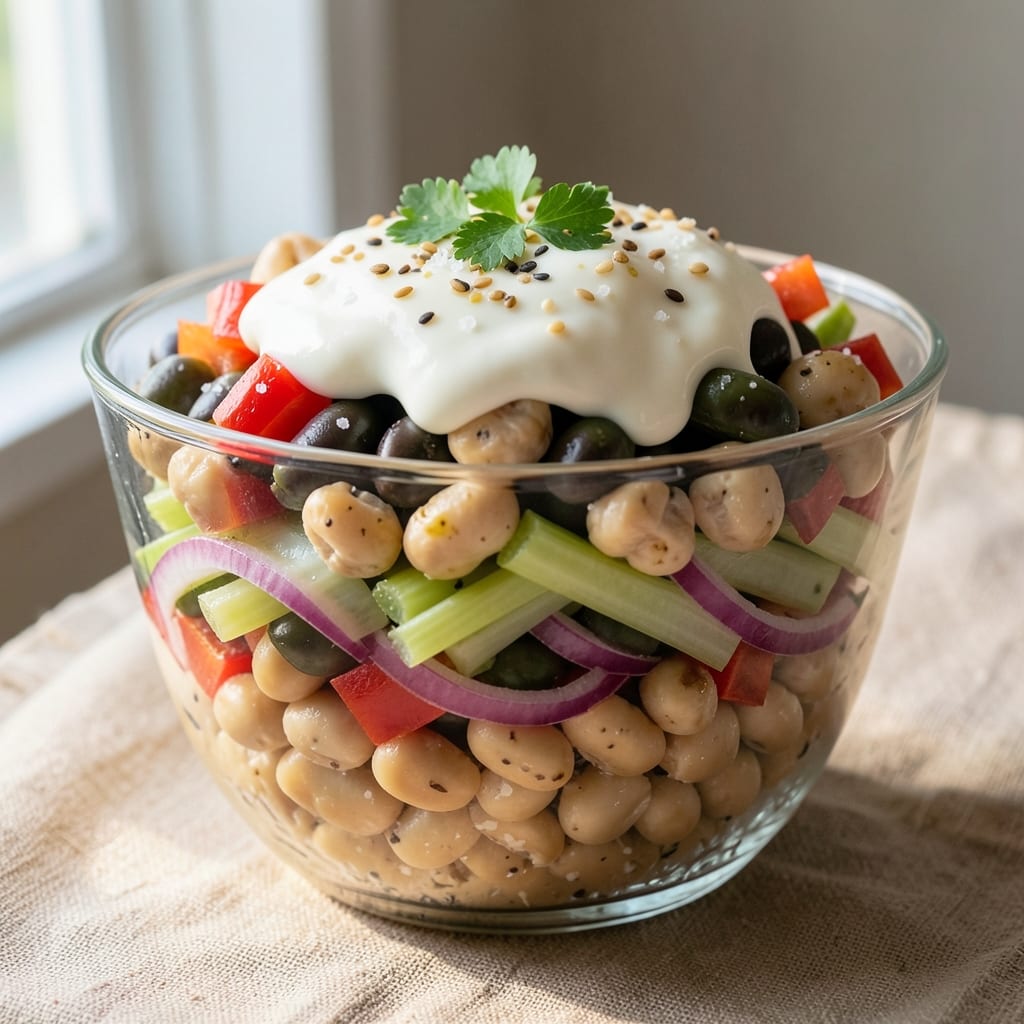
This seven layer bean salad recipe delivers the perfect balance of creamy, crunchy, and tangy flavors in every bite. 💛 The secret lies in precise layering—each ingredient plays a role in creating that signature texture and taste you'll crave for days. What makes this dish special is how simple ingredients transform into something extraordinary with just a few minutes of prep and patience.
The foundation begins with cooked beans, their creamy texture providing the base for all those delicious layers. From there, we build with crisp vegetables, tangy dressing, and creamy toppings that create that signature "seven layer" experience. This salad is foolproof, making it perfect for potlucks, picnics, or meal prep—it keeps beautifully in the fridge for up to a week.
What you'll end up with is a salad that's creamy yet crunchy, tangy yet satisfying, and packed with protein and vegetables. The layers create a satisfying texture with every bite—creamy beans, crisp veggies, and cool dressing all working together in perfect harmony. This is the kind of dish that gets better as it sits, allowing flavors to meld and develop.
Serve it at room temperature or chilled, and watch it disappear from your table. The beauty of this recipe is its versatility—it works as a side dish, light lunch, or even a main course when paired with crusty bread. Let's get started on creating this classic crowd-pleaser!
Ingredients for 7 layer bean salad
Simple ingredients that come together to create a creamy, crunchy masterpiece—no fancy skills needed!
| Ingredient | Amount | Notes |
|---|---|---|
| Canned White Beans 🌱 | 2 cups | Drained and rinsed, no salt added |
| Canned Black-Eyed Peas 🌱 | 1 ½ cups | Drained and rinsed, no salt added |
| Canned Chickpeas 🌱 | 1 cup | Drained and rinsed, no salt added |
| Red Bell Pepper 🌶️ | 1 whole | Diced into small pieces |
| Celery Stalk 🥬 | 3 whole | Diced into small pieces |
| Red Onion 🧅 | 1 whole | Thinly sliced |
| Mayonnaise 🥛 | 1 cup | Full-fat for creaminess |
| Sour Cream 🥛 | ½ cup | Full-fat for richness |
| Dry Cheddar Cheese 🧀 | 1 ½ cups | Shredded, sharp variety |
| Black Olives 🫒 | 1 cup | Pitted and sliced |
| Green Onions 🧅 | 4 whole | Thinly sliced, for garnish |
| Kosher Salt 🧂 | 1 ½ tsp | For seasoning and layering |
| Black Pepper 🌶️ | ½ tsp | Freshly ground |
| Apple Cider Vinegar 🍎 | 1 tbsp | For tangy dressing |
The beans are the heart of this salad, so pick no-salt-added cans to avoid sogginess. Trader Joe's and Whole Foods have great options—look for the brightest, firmest beans in the can. The bell pepper and celery should be crisp, not limp. If they're a little soft, soak them in ice water for 10 minutes to perk them up. For the cheese, sharp cheddar is non-negotiable—it melts just enough to get gooey while keeping texture. The olives? Kalamata or black olives work best—just make sure they're pitted and sliced evenly for that perfect layer.
No sour cream? Greek yogurt works perfectly—just use half the amount. Running out of mayo? Vegan mayo or extra olive oil keeps things creamy. Swap the black-eyed peas for kidney beans if you prefer, but stick to the same total bean volume. The dressing is just mayo, sour cream, vinegar, and a pinch of salt—no fancy ratios here. If you want extra tang, add a splash of lemon juice too. For the veggies, pre-cut mixes save time, but chopping your own gives you better control over texture.
This salad tastes even better the next day once everything melds. Store it in a glass container with layers separated by parchment paper—keeps it crisp for 5-6 days. For meal prep, portion into individual containers so everyone gets their perfect layers. If you're taking it to a potluck, bring the dressing and veggies separately and assemble in a big bowl there. The cheese layer? Add it last so it stays sharp and not soggy.
Why You'll Love This Recipe
- No-Chop Nightmare Ender: The celery and bell pepper? Just dice them roughly—no knife skills required. I keep pre-cut jars in the fridge now because this salad begs for speed, and honestly, the layers still look impressive even if the peppers aren’t perfect cubes.
- Creamy Crunch Magic: That tangy mayo-mustard dressing clings to every bean like it’s been waiting for them. The black-eyed peas add a buttery bite, while the chickpeas bring texture—it’s the kind of salad where every forkful has something happening.
- Potluck MVP: Bring it to a picnic, BBQ, or holiday spread—it’s the dish people actually finish. I’ve packed it in a mason jar for lunch, served it cold at a summer party, and even sneaked it onto my kid’s lunchbox. It’s that adaptable.
- Pantry Goldmine: Three cans of beans, a pepper, and celery? That’s it. No wilting herbs or last-minute shopping. I’ve made this with whatever was in my cupboard, and it’s still the most satisfying leftovers I’ve ever had—better the next day, if you can believe it.
Step-by-step instructions for seven layer bean salad
This creamy, crunchy masterpiece comes together in minutes with layers that pack bold flavors and textures.
👨🍳 Step 1: Prep All Ingredients for Perfect Layering
Start by draining and rinsing all the beans—2 cups canned white beans, 1.5 cups black-eyed peas, and 1 cup chickpeas—to remove any excess starch that could make your salad soggy. Pat them completely dry with paper towels to ensure crisp layers later. Dice the 1 whole red bell pepper into small, even pieces and finely chop the 3 whole celery stalks. Thinly slice the 1 whole red onion for that sharp bite that cuts through the creaminess.
Slice the 1 cup black olives in half and thinly slice the 4 whole green onions, reserving the tops for garnish. Shred the 1.5 cups dry cheddar cheese using the large holes of a box grater for even distribution. Here's the thing—don't skip drying the beans thoroughly. I've made this salad a dozen times, and trust me, dry beans mean crisp layers that hold up perfectly.
🥘 Step 2: Build the Creamy Base Layer
In a large bowl, combine the 1 cup mayonnaise and 0.5 cup sour cream. Stir in the 1 tbsp apple cider vinegar, 1.5 tsp kosher salt, and 0.5 tsp black pepper until smooth and fully incorporated. This creamy base is the foundation of your salad, so make sure it's well mixed—no lumps allowed. The vinegar adds just enough tang to balance the richness of the mayo and sour cream.
Here's where it gets fun—taste and adjust seasoning if needed. You want it to be perfectly balanced: creamy, slightly tangy, and just salty enough to make your taste buds dance. If it needs more salt, add it now before layering. This is your chance to customize it to your liking before adding all the other flavors.
🥘 Step 3: Layer with Precision for Maximum Crunch
In a large glass or clear bowl (this makes the layers visible and impressive), spread the creamy base evenly across the bottom. Then, add the 2 cups white beans in an even layer, gently pressing them down to create a solid base. Next, sprinkle the 1.5 cups shredded cheddar cheese evenly over the beans. This first layer of cheese will melt slightly and bind everything together beautifully.
Add the 1.5 cups black-eyed peas in an even layer, followed by the 1 cup chickpeas. Here's the critical part: don't pack these layers too tightly—you want them to stay distinct and crunchy. Each layer should be about ½-inch thick for that perfect texture contrast. The beans will absorb some of the creamy dressing, but not so much that they lose their bite.
🥘 Step 4: Add Vegetables and Olives for Crunch and Color
Sprinkle the diced red bell pepper evenly over the beans, followed by the chopped celery and red onion. These vegetables add vibrant color and a satisfying crunch that contrasts perfectly with the creamy layers. Next, add the sliced black olives in an even layer. The olives bring a salty, briny flavor that ties everything together.
Finally, top with the thinly sliced green onions, leaving the tops whole for garnish. Here's the moment that matters: press down gently on each layer to help them adhere slightly. This ensures that when you slice it later, each piece has a little bit of everything. Don't press too hard—you want to maintain that crunchy texture, just enough to keep the layers cohesive.
⏰ Step 5: Chill and Rest for Perfect Texture
Cover the bowl with plastic wrap and refrigerate for at least 4 hours, but overnight is even better if you can wait. This chilling time is crucial—it allows all the flavors to meld together and the layers to set properly. The beans will absorb just enough of the creamy dressing to become tender without losing their texture, and the cheese will soften slightly for that perfect bite.
When you're ready to serve, run a sharp knife around the inside of the bowl to loosen the salad, then slice it into wedges or individual portions. The layers should hold together beautifully, with each bite delivering a perfect mix of creamy, crunchy, and tangy flavors. If you're serving this at a party, you'll be the star of the show with this stunning, colorful salad that's as impressive as it is delicious.
Pro Tips For Making 7 Layer Bean Salad
- DRAIN AND RINSE BEANS: The canned beans in this salad need a good rinse—even if they’re labeled "low-sodium"—to cut down on that metallic aftertaste. I learned this the hard way when my first batch tasted weirdly salty, and now I always give them a quick cold-water bath before draining. Skip this, and you’ll regret it later.
- CHOP CELERY AND PEPPER SMALL: If you’re layering this salad in a dish, don’t be lazy with the veggies—cut the celery into ¼-inch pieces and dice that bell pepper into tiny cubes. I used to leave them in big chunks, and the texture was all over the place. Uniform sizing means every bite has that same satisfying crunch.
- LET IT CHILL BEFORE SERVING: This salad needs time to mingle—at least 30 minutes in the fridge, but ideally a few hours. The flavors meld better when everything cools down, and the layers won’t slide apart when you serve it. I know, I know, you’re hungry now, but trust me, the wait makes it worth it.
- SWAP IN A LITTLE ACID: A splash of vinegar or lemon juice in the mayo layer (about 1 teaspoon) keeps the flavors bright and cuts through the heaviness of the beans. I was skeptical until I tried it—now it’s non-negotiable. The acid also helps balance the sweetness of the bell pepper.
Storing and reheating this 7 layer bean salad
Refrigerator Storage
Store your seven layer bean salad in an airtight glass container with parchment paper separating each layer—this keeps the beans crisp and prevents sogginess. I like using Pyrex glass containers because they stack neatly in the fridge and let you see the beautiful layers. Keep it refrigerated at 40°F or below for up to 5-6 days, though I find it tastes best within 3-4 days when the flavors meld perfectly. 💛
Freezer-Friendly Tips
This salad freezes surprisingly well if you prepare it without the creamy dressing and cheese. Assemble all layers except mayo and sour cream, then wrap tightly in plastic wrap followed by foil. Freeze for up to 3 months. When ready to eat, thaw overnight in the fridge, then mix in the dressing and cheese just before serving to maintain texture. The beans stay firm, but the veggies may soften slightly. 🥶
Reheating Methods
For best results, I recommend eating this salad cold or at room temperature—it's designed to be refreshing. If you must reheat, transfer individual portions to a microwave-safe dish and heat for 1-2 minutes on 50% power. Add 1-2 teaspoons of water to prevent drying out. For stovetop reheating, warm gently in a saucepan with ¼ cup water over low heat for 5-7 minutes, stirring occasionally. Always taste and adjust seasoning after reheating. 🔥
Layer Preservation
To maintain those perfect layers when storing, I press plastic wrap directly onto the surface before sealing the container. This prevents the top layer from drying out or absorbing fridge odors. For meal prep, portion into individual glass containers so everyone gets their own perfect slice. The key is keeping the cheese and dressing separate until serving—this prevents the salad from becoming too soft. ✨
Potluck Transport
When taking this to gatherings, I recommend assembling everything except the cheese and dressing in a large bowl. Pack the dressing and cheese separately in small containers. At the event, simply layer the cheese on top and mix in the dressing just before serving. This keeps the salad fresh and prevents soggy layers during transport. Use a cooling bag with ice packs if traveling more than 30 minutes. 🚗
Reviving Day-Old Salad
If your salad has lost some crunch after sitting, don't toss it! Sprinkle 1 tablespoon of cold water over the top and let it sit for 10 minutes before gently stirring. This revives the beans and veggies slightly. For extra freshness, add 1 tablespoon of fresh lemon juice or 1 teaspoon of apple cider vinegar to brighten flavors. I've saved many a salad this way—it's a lifesaver for leftovers! 💡
Nutrition facts
Frequently asked questions about seven layer bean salad
Can I make this salad without mayo?
For a lighter version, replace the mayo with ½ cup Greek yogurt plus ¼ cup olive oil. For a vegan option, use vegan mayo or blend ½ cup silken tofu with 2 tbsp lemon juice and 1 tbsp apple cider vinegar until smooth. The texture will be slightly different but still creamy and delicious.
Why does my salad get soggy?
Sogginess usually happens when beans aren't fully drained or layers aren't pressed gently. Always pat beans completely dry with paper towels and press each layer lightly with a spoon. Store in an airtight container with parchment between layers to maintain crispness for up to 5-6 days. Keep the cheese and dressing separate until serving.
What's the best way to serve this salad?
This salad works perfectly as a main dish with crusty bread or as a side for BBQs and picnics. For a complete meal, pair it with grilled chicken, pulled pork, or smoked salmon. Serve at room temperature or chilled—it's equally delicious either way. The layers hold together beautifully when sliced into wedges for easy serving.
Can I substitute any of the vegetables?
Yes! Swap the red bell pepper for green or yellow bell pepper, or add corn kernels for extra sweetness. For more crunch, try diced cucumber or jicama. If you dislike onions, use green onions only or omit them entirely. The key is maintaining a balance of textures—aim for crisp veggies to contrast the creamy beans.
How do I make this salad ahead for a party?
Assemble everything except the cheese and dressing in a large bowl, then cover tightly. Pack the dressing and cheese separately in small containers. At the party, simply layer the cheese on top and mix in the dressing just before serving. This keeps the salad fresh and prevents soggy layers during transport. Use a cooling bag with ice packs if traveling more than 30 minutes.